Visual communication via typography serves as a powerful tool to convey personality, emotion, and style. The ability to create & design your own font provides a canvas for self-expression and creativity. For an interested graphic designer, font creation is both rewarding and transformative.
Let’s explore designing a custom typeface, from initial sketches to the final product. We’ll delve into the essential concepts of font design, software like Adobe Illustrator, and various font formats, including TrueType font and OpenType font. By the end, you’ll have the knowledge and confidence to craft a unique font that reflects your vision and enhances your projects.

Understanding The Basics Of Font Creation
Before diving into the process, it’s important to grasp some fundamental concepts:
- Font vs. Typeface: A font refers to a specific style of typeface, while typeface is a broader term that encompasses all variations of a design (like weight and style).
- Glyph: A glyph is any specific representation of a character in a font, including letters, numbers, and special characters.
- Font Families: These consist of a group of related fonts (e.g., bold, italic) that share the same design principles.
Step-By-Step Guide To Creating A Font

Step 1: Plan Your Font Design
Before you start creating your custom font, outline what you want. Consider these questions:
- What style do you envision? (serif, sans serif, handwritten, decorative)
- Will it be used for digital platforms like Google Fonts or printed materials?
- Do you want a basic font or a more complex custom typeface?
Step 2: Sketch Your Letters
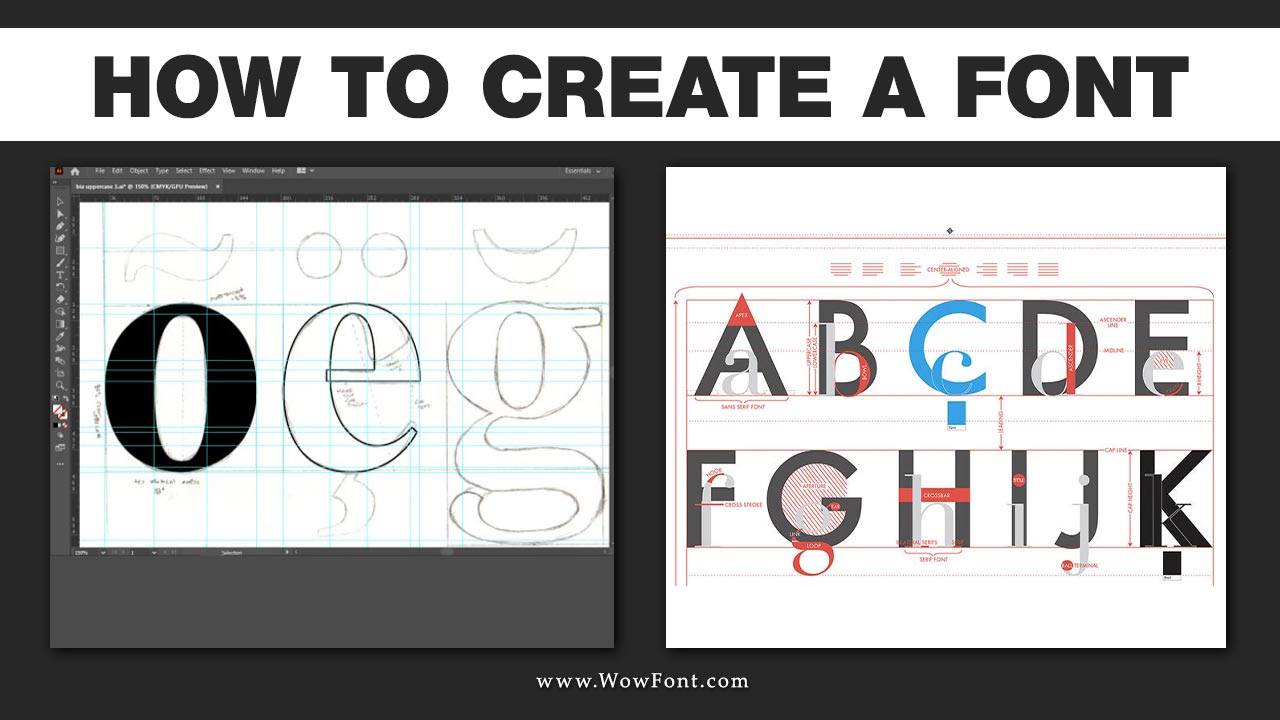
Using paper or a digital drawing tool, start sketching out your letters. You can also experiment with different styles, such as script fonts or decorative elements. Here are some tips:
- Keep a consistent height and width for each letterform.
- Use gridlines to maintain proportion.
- Consider how letters relate to one another; for instance, the shapes of ‘b’, ‘d’, ‘p’, and ‘q’ can influence each other.
Step 3: Digitize Your Sketches In Adobe Illustrator
Once you have your sketches, you can move to Adobe Illustrator:
- Import Your Sketches: If you draw your letters on paper, scan them and import them into Illustrator.
- Use Image Trace: The Image Trace feature converts sketches to vectors, creating clean, scalable letterforms.
- Refine Your Letters: Use tools like the Brush Tool and the Blob Brush Tool to enhance your letterforms. Consider using pressure-sensitive graphics tablets for more dynamic results.
Step 4: Organize Your Letters
After refining your glyphs, organize them into layers within Illustrator:
- Create separate layers for uppercase, lowercase, punctuation, and numbers.
- Use guides to maintain consistency in height and spacing.
Step 5: Prepare Your Characters For Export
Once your letters are finalized:
- Export Each Glyph as SVG Files: Save each character individually in SVG format to keep the file sizes manageable.
- Optimize Your Files: Ensure that each file is as small as possible by removing unnecessary paths and elements.
Step 6: Use Font Creation Software
After exporting, you will need to use font creation software to compile your glyphs into a usable font file:
- Tools like FontForge, FontLab Studio, or Fontself Maker are great options.
- Import your SVG files and map each glyph to its corresponding character code.
Step 7: Test Your Font
Before releasing your new font, test it across different platforms to ensure it displays well:
- Use the font in applications like Adobe Fonts or Google Fonts to see how it performs.
- Pay attention to kerning and line spacing to ensure readability.
How To Create A Font Using Fontforge Software?
Creating a font using FontForge is a straightforward process that allows you to bring your typography ideas to life. Start by designing your glyphs in a vector format using software like Adobe Illustrator or Inkscape, then export each character as an SVG file.
Open FontForge and create a new font project. Import your SVG files by selecting “File” > “Import” and choose your glyphs. Each character will appear in the FontForge workspace, where you can adjust metrics, such as kerning and spacing, to ensure proper alignment. Use the built-in tools to refine your designs, making any necessary adjustments to paths or shapes.
Once you’re satisfied with your font, navigate to “File” > “Generate Fonts” to export your creation in formats like TrueType or OpenType. Before finalizing, test your font in various applications to ensure it displays correctly. With FontForge, you can seamlessly transform your creative concepts into a functional typeface, ready for use in any design project.
Conclusion
Creating your own font is a fun way to enhance your design projects. It allows you to show your unique style. Start with a clear plan and practice regularly.
Take your time to refine your work. With the right tools, you can turn your ideas into a custom typeface. Whether you want a playful handwritten look or a clean modern design, enjoy the process. Take pride in your creation. Your custom font will add a personal touch to everything you do!
FAQs
1.What Software Do I Need To Create A Font?
Any font designer commonly uses Adobe Illustrator for design and tools like FontForge or FontLab Studio for font creation.
2.Can I Sell My Custom Font?
Yes, you can sell your custom font on platforms like Envato Elements, but ensure it’s well-designed and properly licensed.
3.What Is The Difference Between Truetype And Opentype Fonts?
TrueType fonts are widely used for digital displays, while OpenType fonts offer more advanced typographic features.
4.How Long Does It Take To Create A Font?
The time can vary based on complexity, but expect several hours to days for design, refinement, and testing.
5.Can I Use My Handwriting To Create A Font?
Yes! You can scan your handwritten letters and convert them into a digital font using the steps outlined above.


Leave a Comment